Особливості підключення відеореєстратора та налаштування роботи з сайтом хмарного сервісу
За допомогою даної статті-інструкції Ви зможете легко і швидко налаштувати віддалений доступ до вашого пристрою.
Щоб підключити відеореєстратор до інтернету, Вам необхідно приєднати його до своєї локальної мережі. Наприклад, якщо Ви використовуєте домашній Wi-Fi маршрутизатор TP-Link TL-WR841N, то потрібно підключити мережевий кабель в
LAN-роз’єм маршрутизатора і в відповідний роз’єм в відеореєстраторові. Далі необхідно присвоїти ip-адреса відеореєстратора. Для цього потрібно зайти в меню реєстратора:
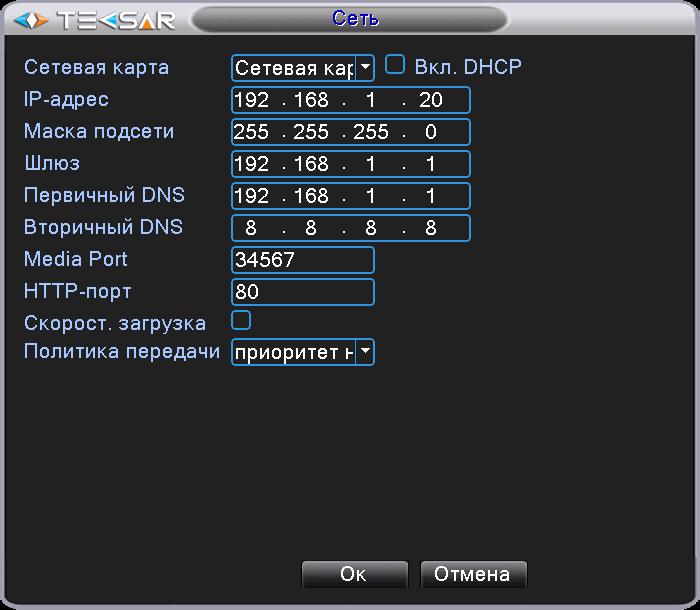
Головне меню – Налаштування – Мережа та присвоїти йому ip-адреса, який буде знаходитися в одній підмережі з маршрутизатором. Наприклад, якщо Ви використовуєте TP-Link TL-WR841N, значить, його ip-адреса буде 192.168.1.1 (цю інформацію можна подивитися на етикетці маршрутизатора або в інструкції); в такому випадку Вам необхідно задати адресу в діапазоні 192.168.1.2 – 192.168. 1.254. При цьому варто врахувати, що адреса може бути зайнятий іншим ПК або смартфоном. Тому, адреса краще вибирати з діапазону 192.168.1.20 – 192.168.1.50. Вказуємо основний шлюз 192.168.1.1 – це і є ip-адреса маршрутизатора. Маска підмережі залишається 255.255.255.0. Вказуємо адресу DNS 192.168.1.1 і вторинний 8.8.8.8. У результаті повинно вийти так: :
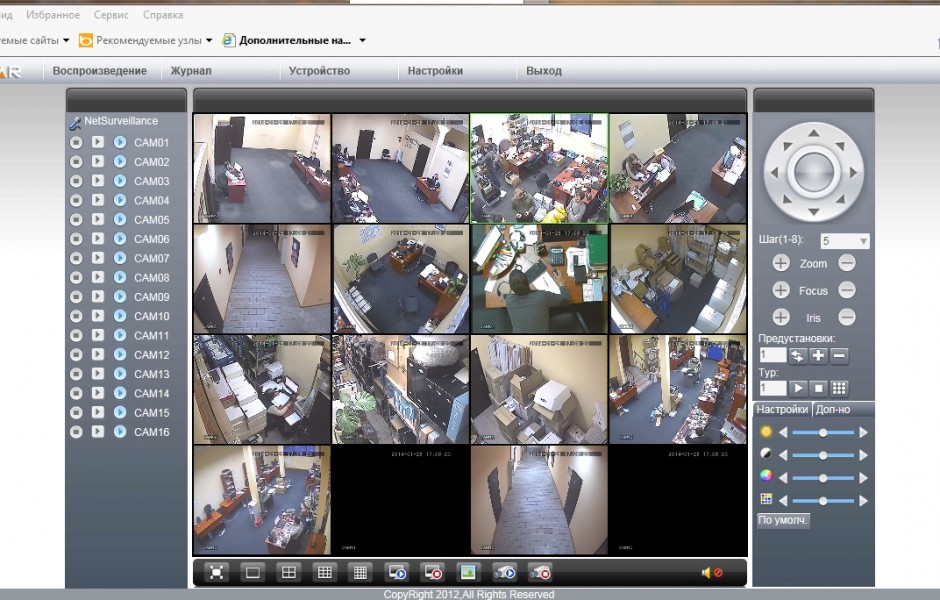
Тепер, коли реєстратору присвоєно ip-адреса, на нього можна зайти з іншого ПК, який підключений до цього ж маршрутизатора. Щоб підключитися до реєстратора з іншого ПК необхідно відкрити на комп’ютері браузер Internet-Explorer (саме цей браузер, тому що з інших браузерів ви не зможете підключитися) і ввести в адресний рядок ip-адресу, яку Ви присвоїли відеореєстратора (у нашому випадку це 192.168.1.20). Браузер запропонує Вам встановити елемент Active X (рядок зверху, виділена жовтим кольором), погоджуйтеся і встановлюйте. Якщо виникнуть проблеми з встановленням або брандмауер Windows стане блокувати додаток, то додайте правило для завантаження непідписаних елементів Active X. Це можна зробити наступним способом: зайти в Меню – Панель управління – Властивості браузера – Безпека – Інтернет – Інший; після відкриється вікно, в якому потрібно знайти всі фрази, де зустрічається слово Active X і дозволити браузеру виконувати всі необхідні функції (тобто поставте галочки навпроти фраз з Active X). Після установки відкриється вікно привітання, де необхідно ввести логін і пароль доступу до відеореєстратора (за замовчуванням логін – admin, пароль відсутній).
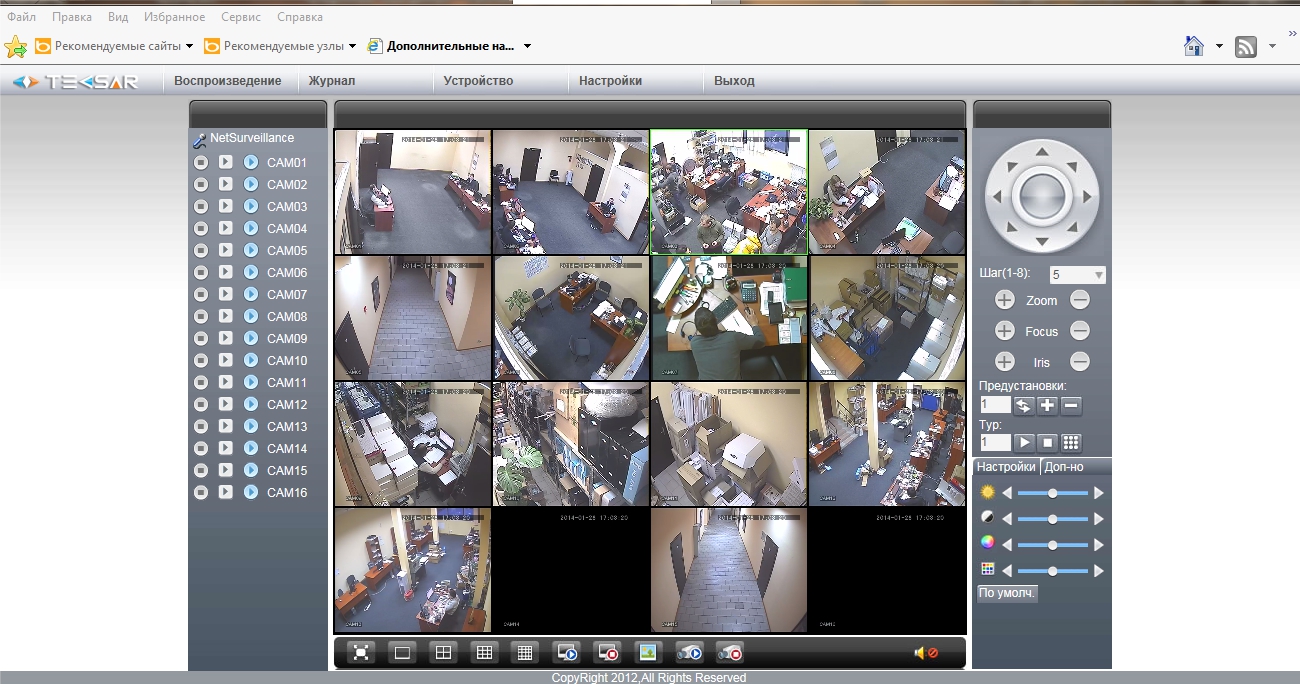
Якщо на екрані відобразилося дане вікно – Ви налаштували все вірно. Тепер необхідно зробити так, щоб на відеореєстратор можна було зайти віддалено. Переходимо до налаштування віддаленої роботи з реєстратором, зробити це можна трьома способами:
1. У Вас динамічний ip-адреса і Ви хочете використовувати хмарний сервіс.
2. У Вас динамічний ip-адреса і Ви хочете зробити його статичним.
3. У Вас статичний ip-адресу.
Статичний ip-адреса не змінюється – це постійний ip-адреса, який Вам виділив Інтернет-провайдер. Динамічний ip-адреса може змінюватися періодично, його неможливо використовувати для віддаленого доступу. Якщо Ви не знаєте, який у Вас адресу (статичний або динамічний), зверніться за інформацією до свого Інтернет-провайдера.
Приклад № 1. Якщо у Вас динамічний ip-адреса і Ви хочете використовувати хмарний сервіс
1) Зайдіть в налаштування відеореєстратора: Головне меню – Настройки – Мережеві служби – Хмара (натисніть «ВКЛ» для включення використання хмарного сервісу).
2) Зайдіть на сайт
http://tecsar-cloud.com.ua/ з браузера Internet-Explorer, виберіть вкладку
«Пристрій», введіть шестнадцатізначний серійний номер реєстратора (його можна подивитися в настройках реєстратор, зайшовши в
Головне меню – Настройки – Відомості – Версія ) і введіть код перевірки з картинки.
3) Натисніть «Увійти».
Готово. Ви підключилися в відеореєстратора за допомогою хмарного сервісу.
Приклад № 2. Якщо у Вас динамічний ip-адреса і Ви хочете зробити його статичним
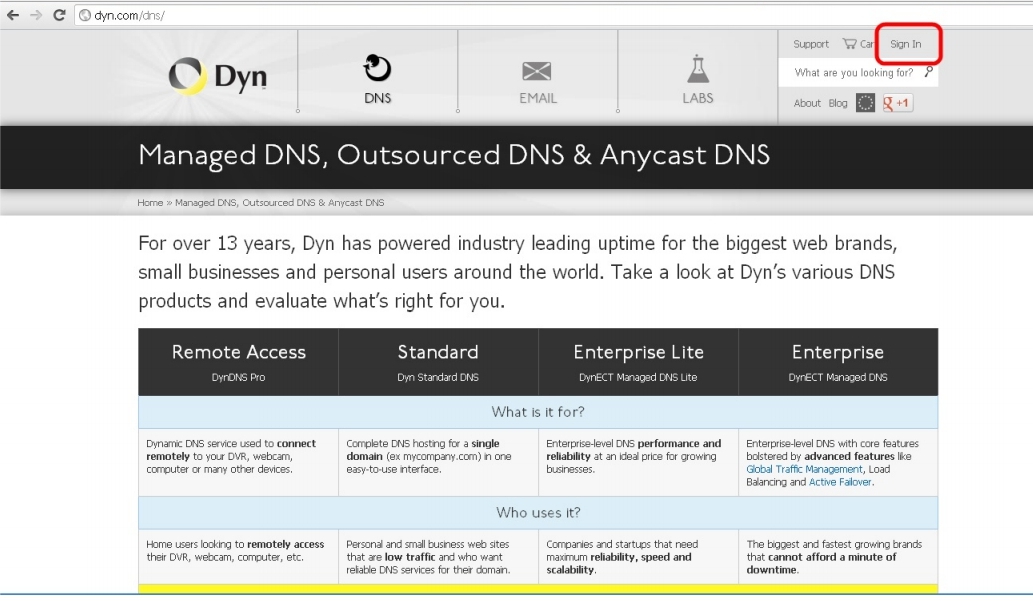
1) Вам необхідно використовувати платний сервіс, який дозволяє зробити динамічний ip-адреса статичним доменною адресою. Іншими словами, це адреса по типу dacha.dyndns.com, який буде постійним і буде Вам належати. Даний сервіс платний. Але ціна не велика в порівнянні з можливостями, які він Вам надасть. Розглянемо на прикладі сервісу
http://dyn.com/dns/ . Для цього зайдіть на сайт сервісу і створіть для себе аккаунт.
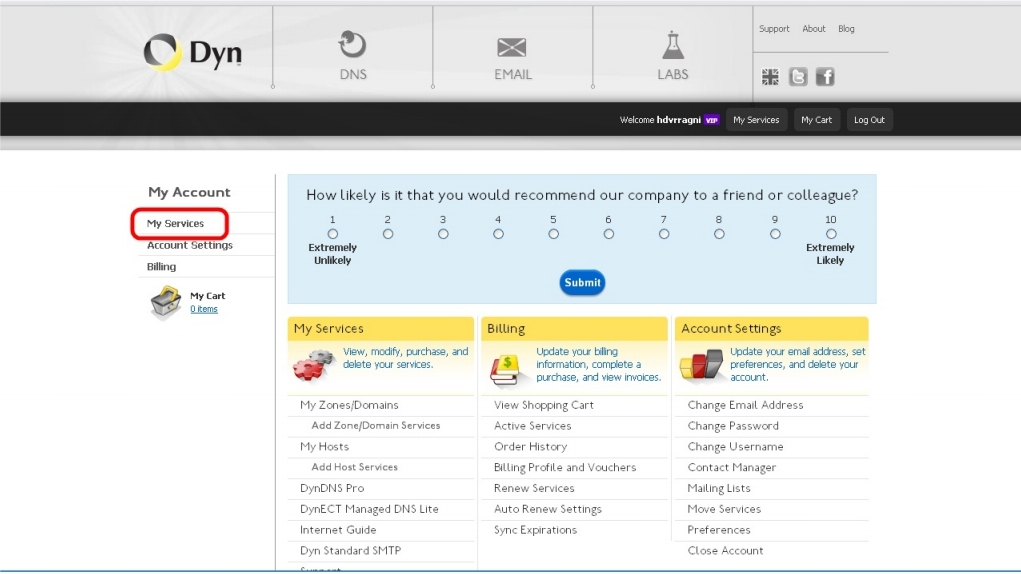
Для того щоб створити аккаунт, зайдіть на сайт сервісу і зареєструйтеся:
Далі:
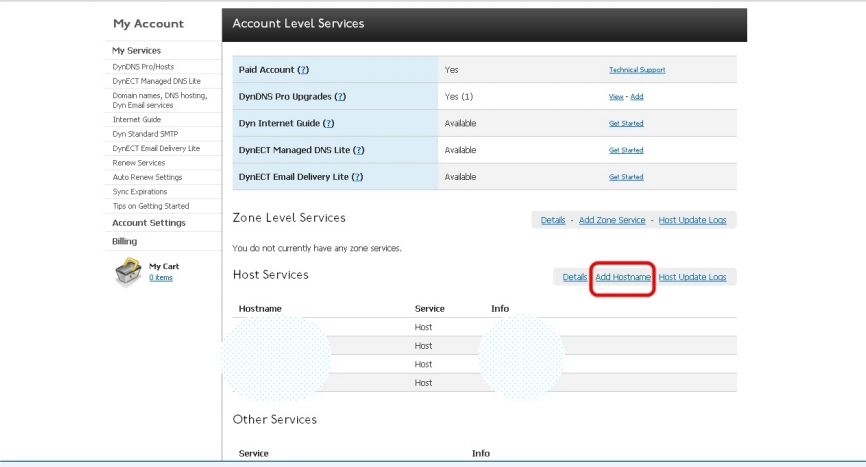
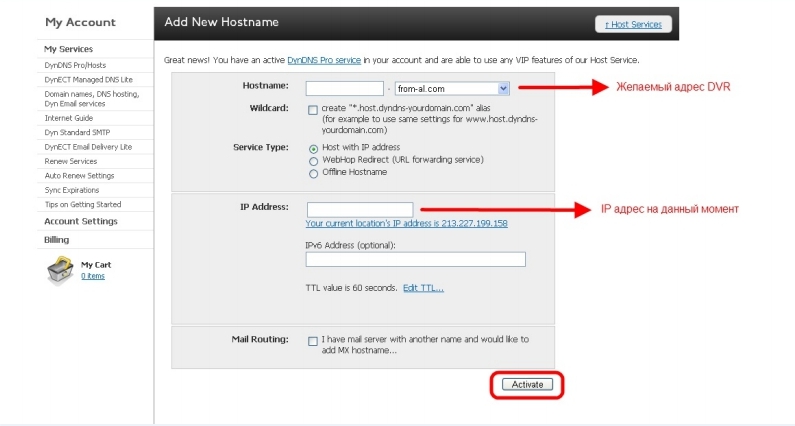
Створіть собі хост:
Далі:
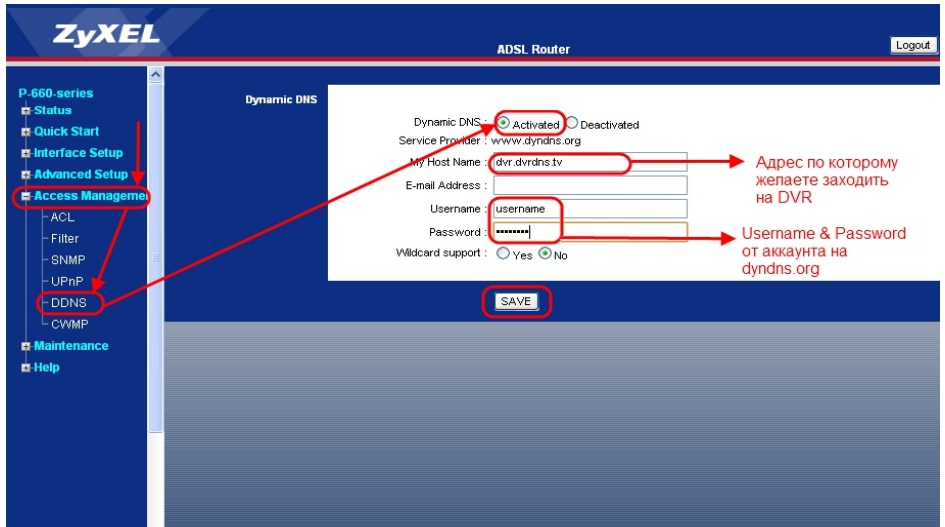
Після того, як Ви створили хост, потрібно зробити деякі налаштування на маршрутизаторі:
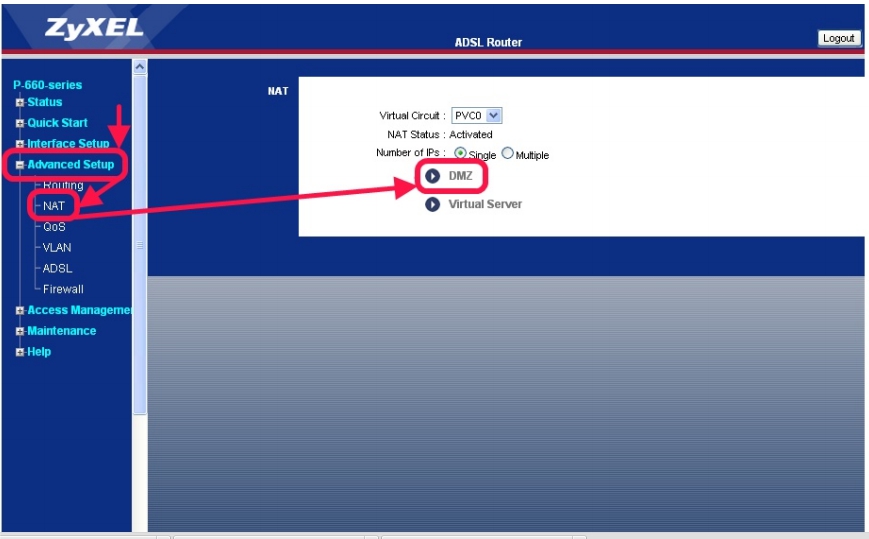
Приклад № 3. Якщо у Вас статичний ip-адресу і Вам необхідно прокинути порти на маршрутизаторі
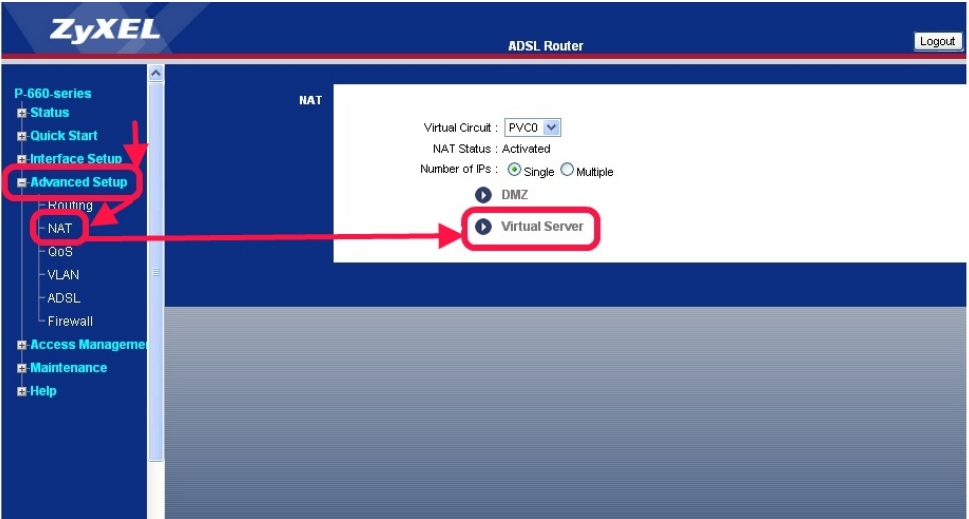
Розглянемо на прикладі маршрутизатора Zyxel:
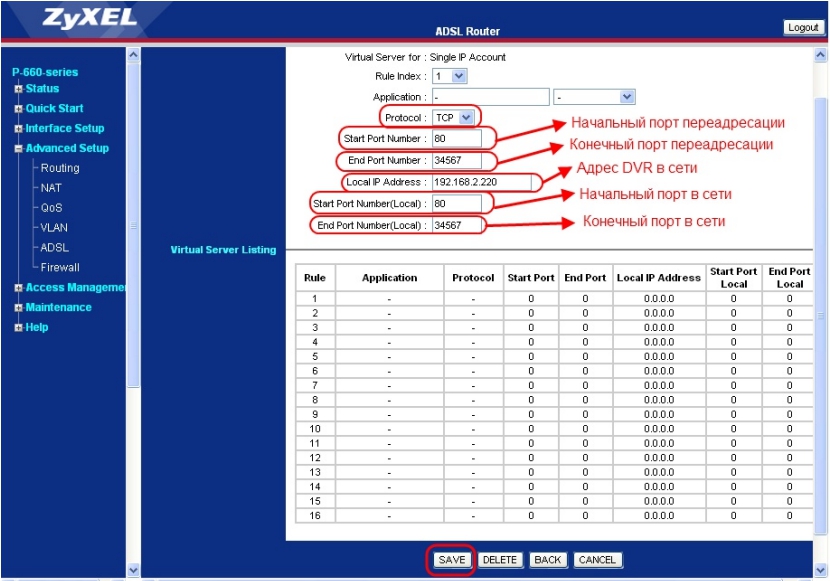
Перенаправьте потік інформації з зовнішніх портів на локальні:
Далі:
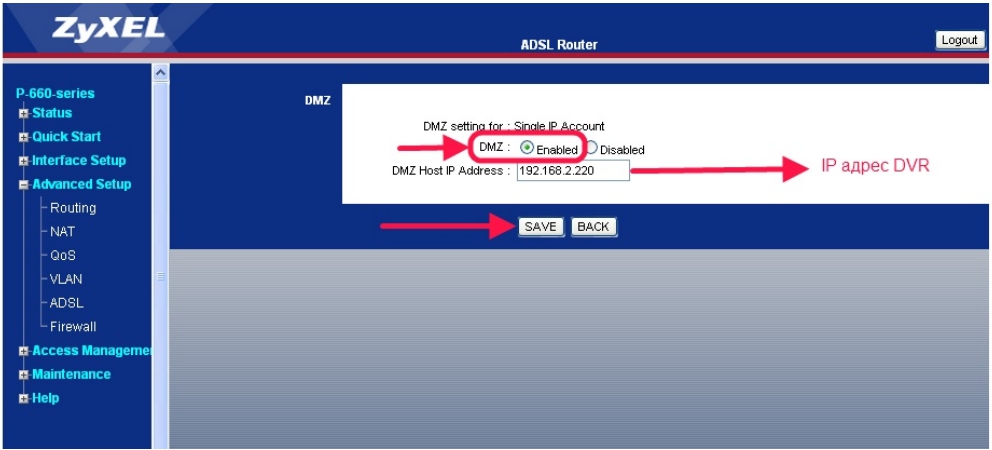
Внесіть ip-адреса DVR в DMZ зону маршрутизатора:
Далі:
Нижче наведені посилання на відео інструкції по кидок портів для інших маршрутизаторів:
Це далеко не весь список, тому вписуйте в пошуку модель Вашого маршрутизатора і дивіться огляд.
Підключення до ПК без інтернету і додаткового устаткування
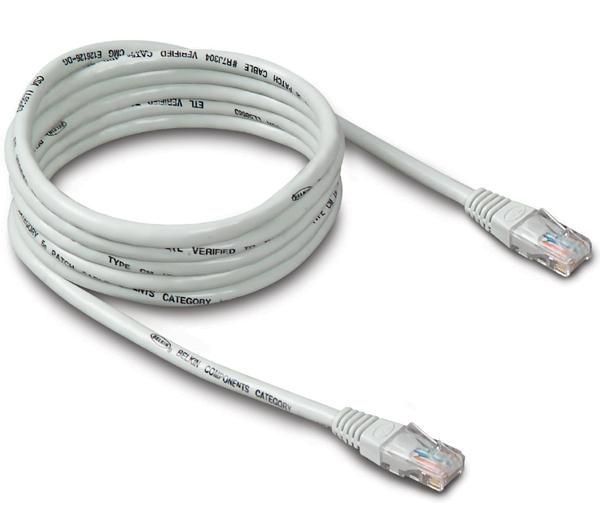
Якщо у Вас немає додаткового обладнання (маршрутизатора, комутатора), у Вас є тільки комп’ютер і відеореєстратор, Ви можете з’єднати ці два пристрої разом. Якщо у Вас немає монітора для перегляду зображень з камер, але Вам потрібно швидко скинути відеофайли з жорсткого диска відеореєстратора на ПК, для того, щоб з’єднати реєстратор з комп’ютером, Вам знадобиться звичайний Ethernet кабель з роз’ємами RG-45:
Після того, як Ви з’єднали кабелем реєстратор і ПК, потрібно налаштувати коректно роботу цих двох пристроїв.
Налаштування реєстратора
Переходимо до налаштувань: Головне меню – Налаштування – Мережа:
Параметри за замовчуванням:
Ip-адреса – 192.168.1.10
Маска підмережі – 255.255.255.0
Основний шлюз – 192.168.1.1
DNS сервер – 192.168.1.1
Вторинний DNS – 8.8.8.8
Ці настройки залишаються. Якщо Ви раніше їх міняли, то відновите:
– Ви можете ввести налаштування наведені вище вручну;
– Ви можете скинути налаштування реєстратора до заводських.
Налаштування ПК
1. Якщо у Вас Windows 8, 7, vista:
Пуск – Панель управління – Мережа та інтернет – Центр управління мережами і загальним доступом – Зміна параметрів адаптера – Підключення по локальній мережі (правою кнопкою миші-властивості).
2. Якщо у Вас Windows XP:
Пуск – Панель управління – Мережеві підключення – Підключення по локальній мережі (правою кнопкою миші-властивості).
У властивостях підключення по локальній мережі, виберіть Протокол інтернету v4 і натисніть Властивості, поставте галочку в Використовувати наступний ip-адресу.
Далі пропишіть ip-адреса комп’ютера:
Ip-адреса – 192.168.1.2
Маска підмережі – 255.255.255.0
Основний шлюз і інші настройки прописувати не потрібно.
Натисніть ОК, для того щоб збереглися настройки. Після цього збережені налаштування варто перевірити, для цього відкрийте браузер internet explorer, введіть в адресний рядок ip-адреса реєстратора 192.168.1.10 і перевірте. Дана процедура описана на сторінці 1 і 2.
Сподіваємося, що у Вас не виникло жодних проблем при налаштуванні і підключенні відеореєстратора до мережі передачі даних і організації віддаленого доступу. Завжди раді допомогти Вам і дати відповіді на Ваші питання.
З технічних питань Ви можете звернутися в службу техпідтримки по телефону. З питання придбання / замовлення товарів з асортименту магазину звертайтесь за телефоном +380979661803 або через форму зворотного зв’язку на сайті